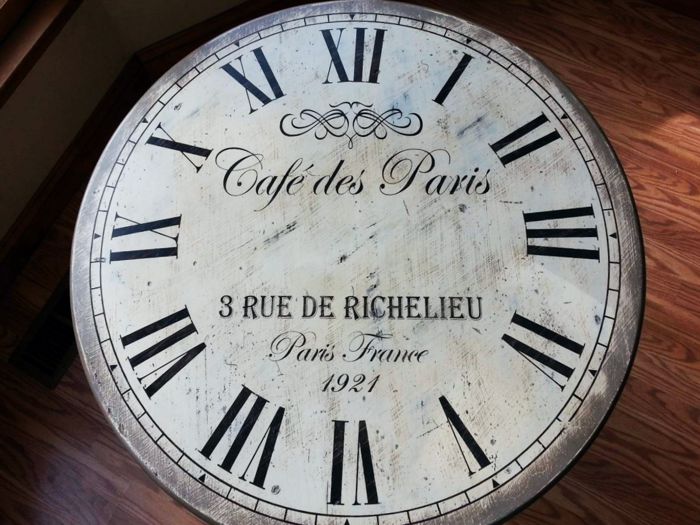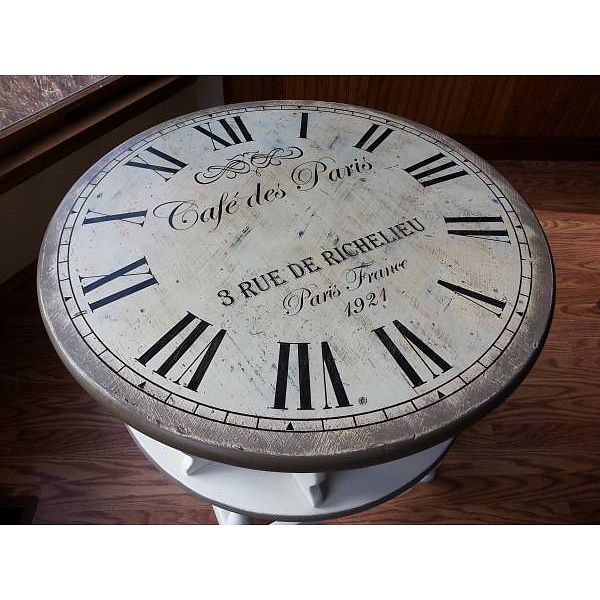

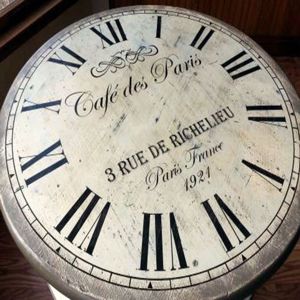
Clock tables are so incredibly beautiful. If you are a do-it-yourselfer, you will find our Paris Roman Clock stencil a cinch for making wall clocks or clock tables. This was my first project using chalk paint and the distressing technique on a darkly stained wood table. I never thought stenciling a clock onto a table could be so easy and look so professional.
I discovered a cheap table at a consignment shop for $10. The table looked a bit beat up and tired, but since I was going to paint and distress the table, and wanting the final table to look somewhat aged and vintage, I felt it would be perfect. The table was also a lazy susan table – the top half rotated 360 degrees – which was icing on the cake. This table was my number one find!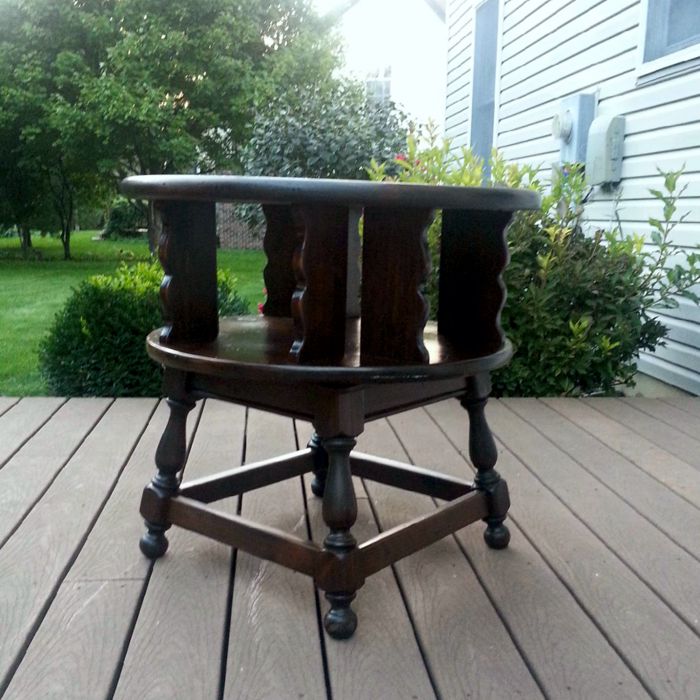
Below is the short list of supplies and the procedure I followed:
Supplies
- chip brushes
- 1/2″, 1-1/2″ stencil brush
- sanding pad
- clean cloth for polishing
- squirt of dish washing detergent in 1 gal water w/ 1/4 c of vinegar
- Folk Art Home Decor Chalk Paint -Color: Sheepskin
- latex flat paint (color: grey w brown)
- Plaster of Paris
- Paris Roman Clock stencil
- Minwax paste finishing wax (special dark)
Step 1
Wash the table with a solution of dish washing detergent and vinegar solution. Allow to dry. Using a chip brush, give the table 2 coats of the Folk Art Home Decor Chalk Paint (sheepskin color). Allow to dry between coats.
Step 2
For this next step, I made my own chalk paint for the grey/brown paint using a recipe for chalk paint I found on the internet. Chalk paint can be made very inexpensively by mixing leftover latex paint from other projects, some water and Plaster of Paris. So I chose a grey paint that had a little brown tint to it. Apply two coats of the grey/brown chalk paint to the table top, letting it dry between coats.
Step 3
Next comes the sanding. Moisten the sanding pad and sand the top of the table. Remove most of the grey/brown paint, so that the white color (sheepskin) is clearly visible and only a small amount of the grey/brown paint showing . I was surprised how hard it was to remove the grey/brown paint. I could have gotten away with just one coat instead of two. Also, I wanted there to be visible scratch lines on top to produce a more rustic, distressed surface.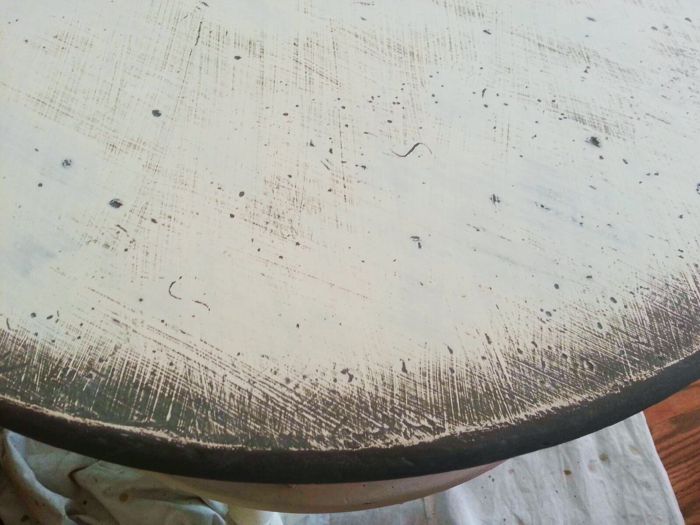
Step 4
Finally, time to stencil! Position the stencil on the table (the Paris Roman Clock stencil has an adhesive on the back). Using black acrylic paint and a stencil brush, apply paint to the openings in the stencil, using the dry brush method. The dry brush method is explained clearly in our stenciling video. Immediately remove the stencil. Do not wait for the stencil paint to dry before removing your stencil. Allow the paint to dry for at least 2 hours before applying the wax.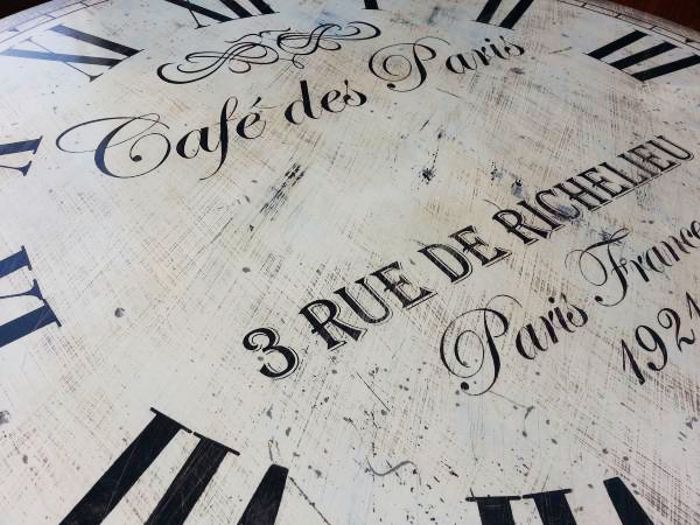
Step 5
Using a stencil brush, apply a thin coat of wax to the table top. Allow the wax to dry for about 15-20 minutes. Take a clean cloth and buff the surface. I applied 4 coats of wax total, allowing a dry time of about 6 hours between coats, and sometimes overnight as well.
The wax is pretty durable but I would not place cold or hot drinks on the table without a coaster. An alternative to the wax, or in addition to the wax, you can place a glass top on the table. This table is a great conversation piece and adds a bit of Parisian beauty to my home. Enjoy!…or as the French say, Prendre Plaisir!