


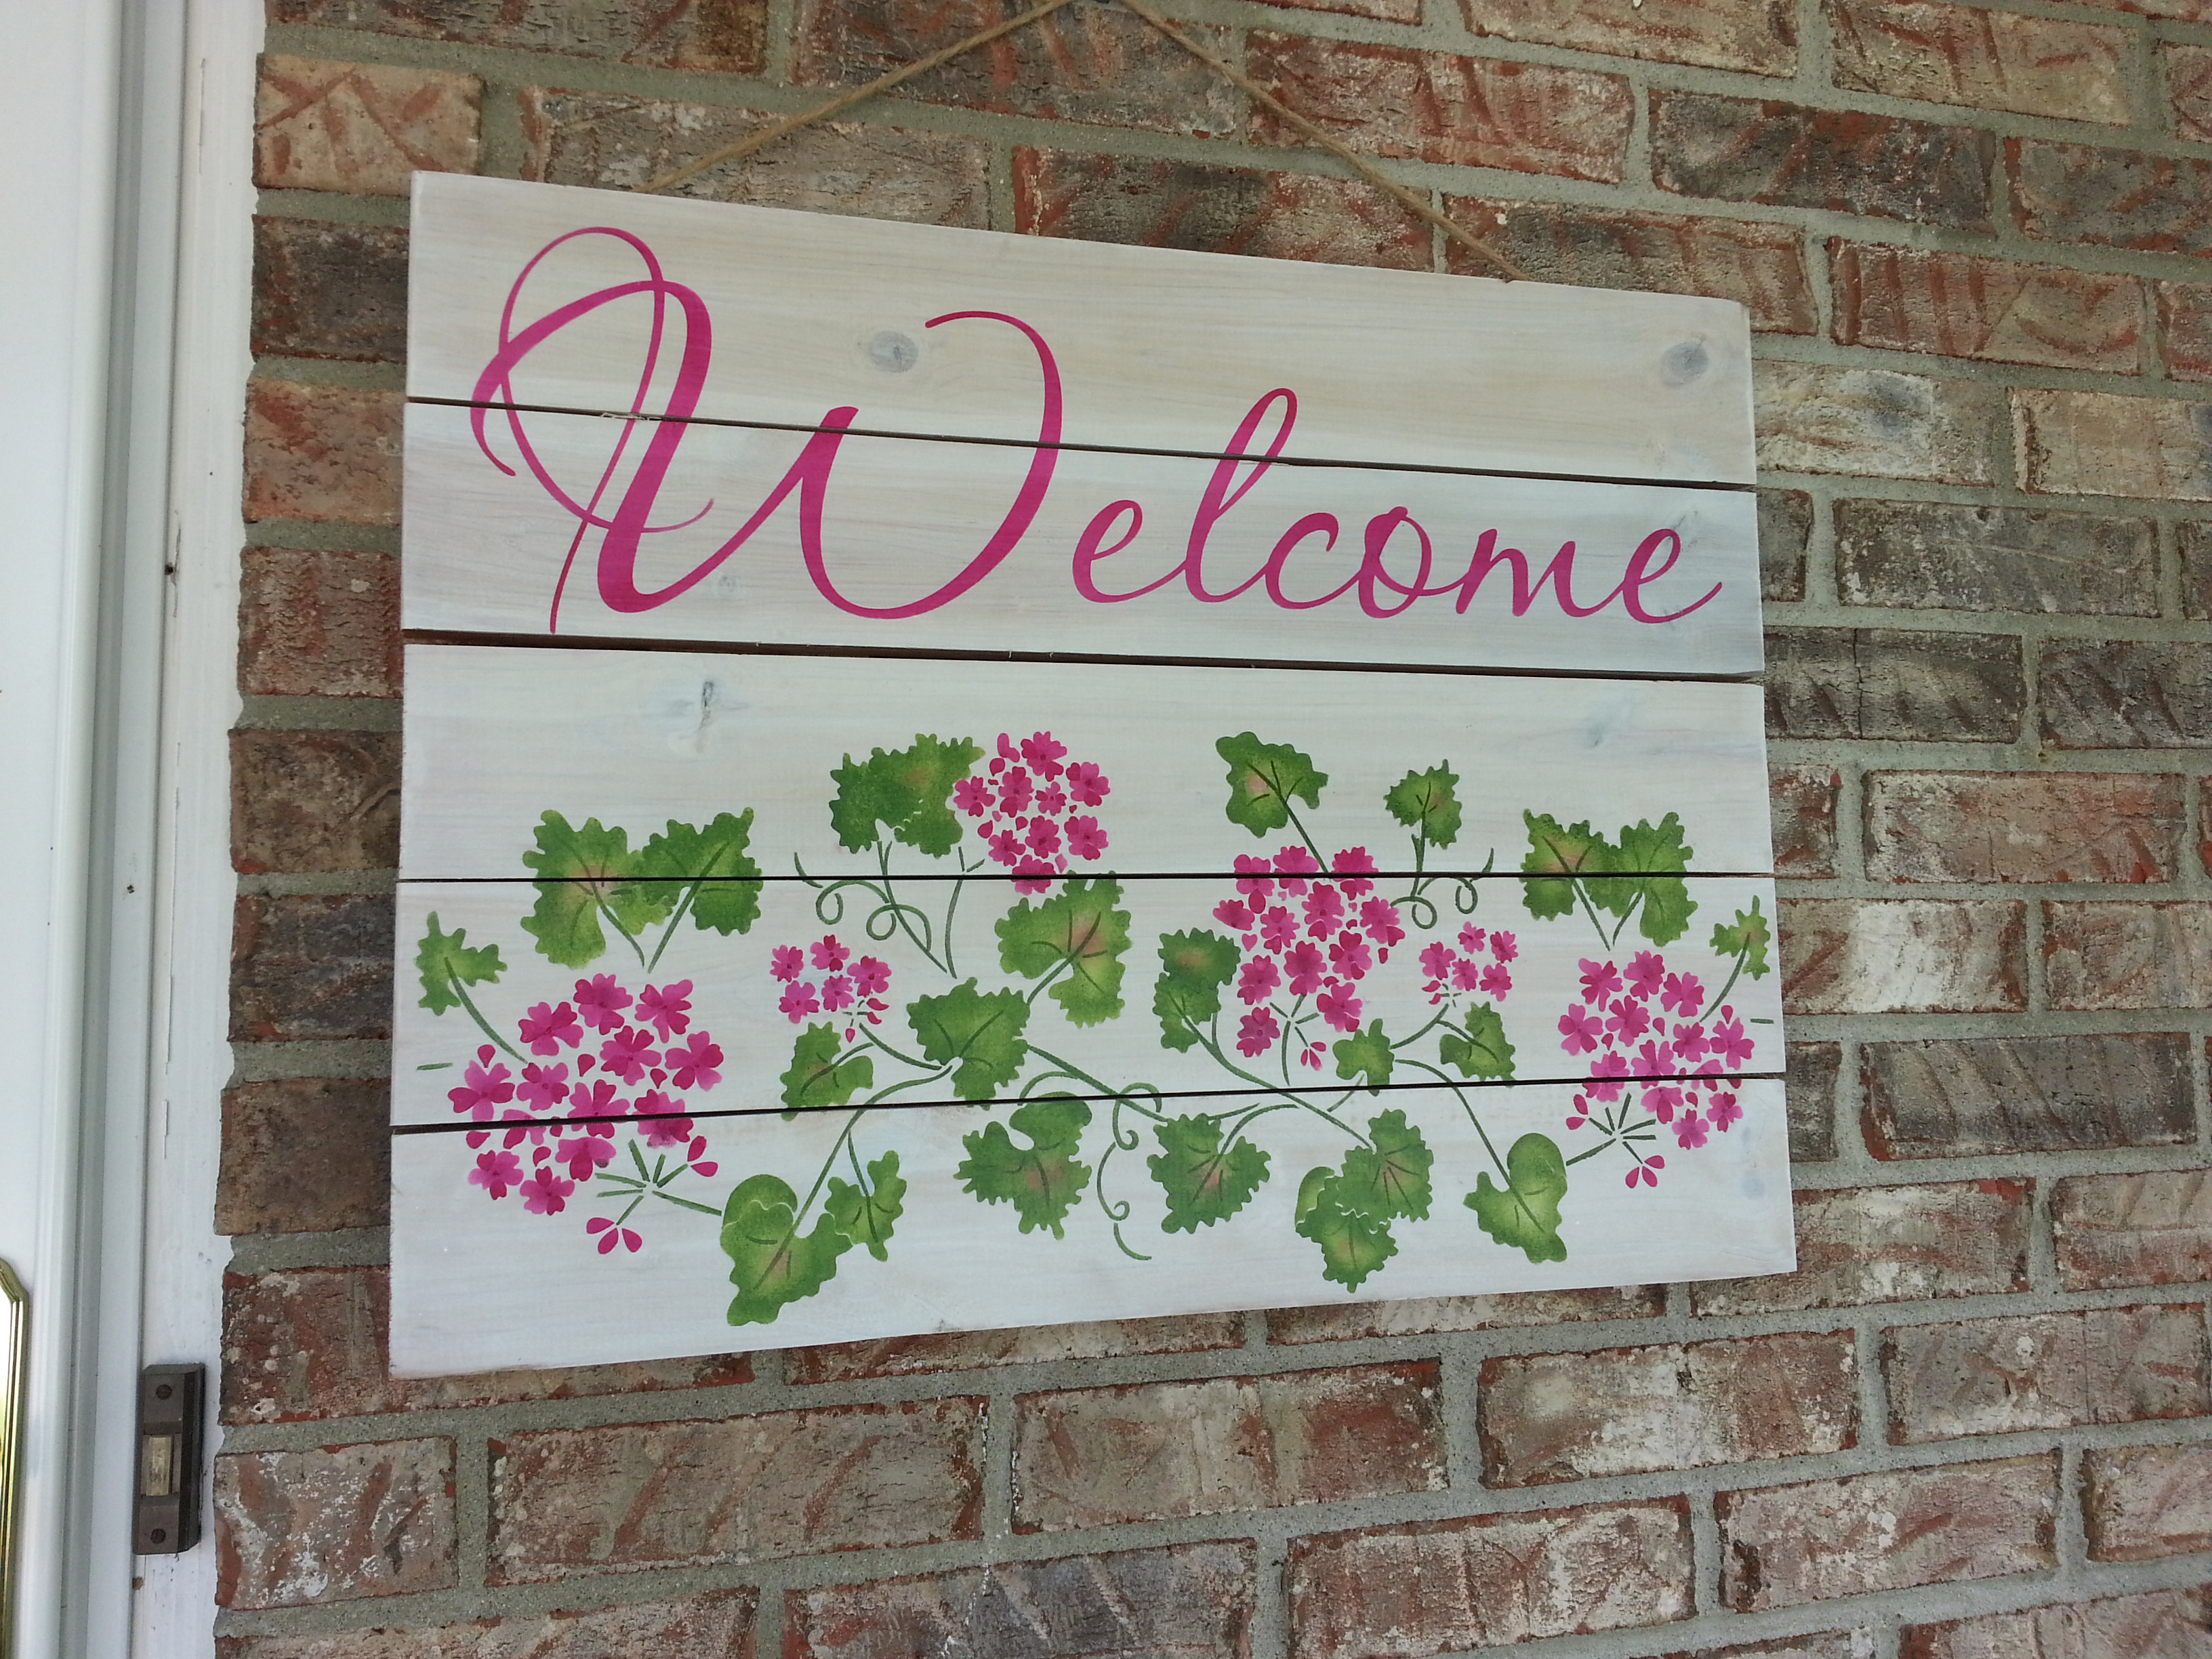
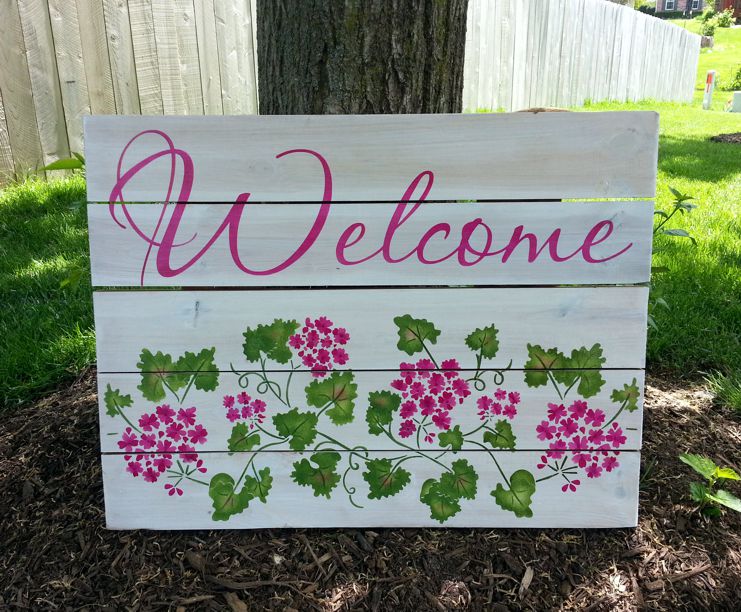
Brighten your porch or deck with the Geranium Flower DIY Welcome Sign. This colorful DIY flower welcome sign uses only two stencils: the Geranium Border stencil and Welcome stencil. This sign is simple to make, taking only one weekend to complete the geranium flower DIY welcome sign project.
I absolutely love bright, colorful welcome signs. One of my favorite summer flowers is the geranium, so I chose the Geranium Border stencil for my welcome sign. The wonderful thing about stenciling is that you can choose the flowers colors that coordinate with the exterior of your home, patio furniture, door or shutter colors. The Geranium Border design divides the flower petals on two different overlays, which makes it very easy for you to have flowers with two colors. Having more than one color adds a bit of depth and interest to your flowers.
This was also my first time working on a small store bought wood pallet sign. Mine measured 24″ wide X 18″ tall. You can find them in most hobby and craft stores. If you are a serious DIY-er you can make your board from old pallets to whatever dimension you prefer. I guess I’m not a hard core DIY-er (smirk).
Here’s what you’ll need:
Supplies for the Geranium Flower DIY Welcome Sign:
- Wood Pallet Sign (mine was 24″ wide X 18″ tall)
- Geranium Border stencil DS2959
- Welcome stencil WW355
- Wicker White craft acrylic paint 2 oz bottle (Folk Art)
- Bright Magenta craft acrylic paint 2 oz bottle (Apple Barrel)
- Magenta craft acrylic paint 2 oz bottle (Delta CeramCoat)
- Sprout Green Patio Paint acrylic 2 oz bottle (DecoArt)
- Olive Green craft acrylic paint 2oz bottle (Folk Art)
- Hauser Green Light craft acrylic paint 2 oz bottle (Folk Art)
- blue painter’s tape
- stencil brushes (3/4″, 1/2″)
- Rust-oleum Painter’s Touch 2X Ultracover Matte Clear spray finish
Step 1:
I wanted my geranium flower welcome sign to have a white washed background. I wanted the wood sign to be lighter than the natural wood, but not bright white. I mixed Wicker White craft acrylic paint 50:50 with water and painted the sign front. I applied the 50:50 mixture with a large stencil brush. The effect produced was a white wash effect that allowed the wood grain to be slightly visible, which is exactly the effect I wanted. Allow to dry for about 2 hours.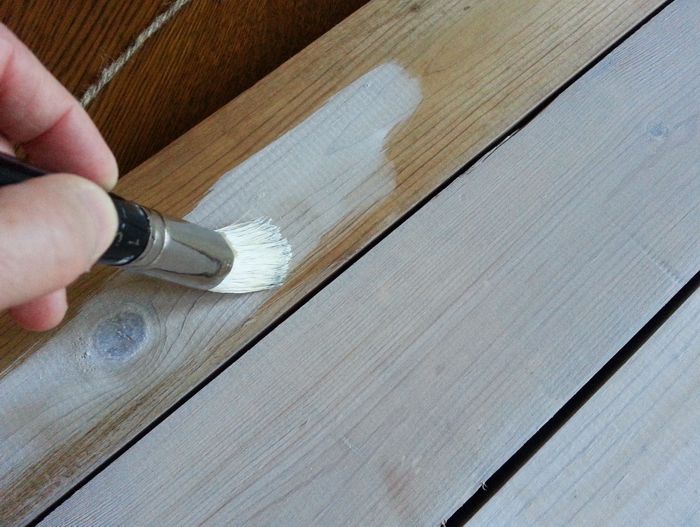
Step 2:
I then planned out how my flowers would be arranged on my sign board. If you are not sure what colors to use, use a piece of poster board to experiment with the colors and the arrangement of the flowers. Practicing on poster board helped me make certain my colors complemented one another but also contained enough contrast.
Step 3:
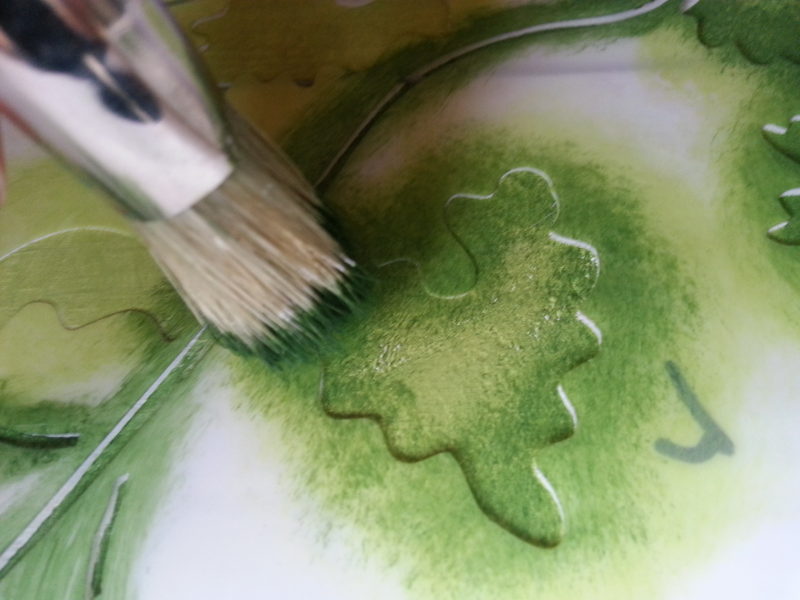
My stencil design had 2 overlays/stencils. I began with stencil number 1, which contains flower portions as well as leaves and vines. I secured it in place on my board with painter’s tape. I taped off all of the flower petals that were too close to the leaves, as I did not want to accidentally get green paint into any of the flower petals areas. I made certain to mark the registration triangles with a light pencil (they are erased at the end). Using a stencil brush, I applied Hauser Green Light paint paint to all the cutout portions of the leaves on stencil #1, followed by application of a 50:50 mix of Sprout Green and Ivy Green around the edges of the leaves. Using this darker shade around the edge of the leave, while using a lighter shade for the central portion, helped to create a leaf with more interest and depth. MOST IMPORTANT TIP: Make sure you offload your brush onto paper towel before you apply paint to the stencil. This prevents bleed through.
Next up were the flower petals. I removed all of the tape covering the flower petals, and now covered the leaves that were too close to the flower petals. Using a stencil brush, I applied the lighter shade of fuchsia (Bright Magenta) to the cutout portions of the geranium flower. After applying Bright Magenta to to all the cutout flower portions, I removed the stencil.

Step 4:
If you are offloading onto a paper towel correctly, you should not have to wait between overlay #1 and #2. Secure stencil #2 to the board. For more information on how to offload, please visit our “how to stencil” video. Apply the darker shade of fuchsia (Magenta) to the portions of the geranium flower and the green paint to the leaves and vines, as you did in step 3.
Step 5:
To place a light blush of color to the center of some of the leaves, use a very light amount of the Bright Fuchsia applied with a small stencil brush and a light touch.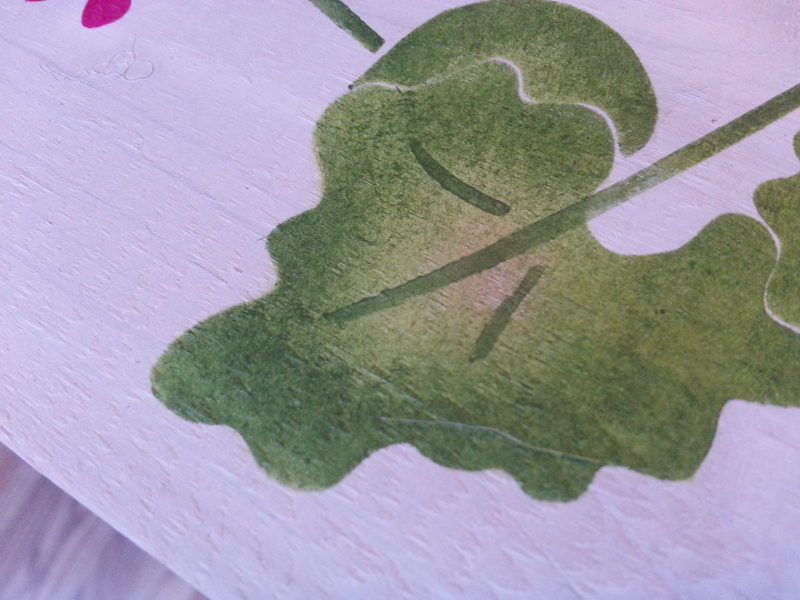
Step 6:
The very last step is to paint the Welcome stencil at the top of the sign. I applied the darker shade of fuchsia (Magenta) to the cutout letters.
 Allow to dry.
If your geranium flower welcome sign is going to be outdoors, you will want to protect your sign from the elements. Give your welcome sign one or two coats of clear matte spray. My favorite spray is Rust-Oleum Painter’s Touch 2X Ultra cover Matte Clear, which has an excellent nozzle that has never clogged.
The geranium flower DIY welcome sign project was great because it was short and sweet – it took one weekend to complete which easily fit into my busy schedule. I am so pleased with the results. Please let me know about your flower welcome sign projects. If you’d like to comment, please do so below. I would love to hear from you.
For a wide variety of flower stencils, please visit our Flower Stencil Collection with over 100 flower stencil designs. Enjoy!
